
|
|
 2013-09-30, 22:22
|
#1 | |
|
Join Date: Dec 2012
Posts: 269
|
Many of you continue to play this game because no other First Person Shooter can replicate the gameplay found in this mod; however, the graphics are poor compared to newer games on the market due to this being a older engine. This guide aims to improve it with achieving the best possible graphics for this mod. This is a NVidia Guide. I am sure AMD cards can replicate this but that is out of my scope because I have only a nVidia GTX Titan. I have tested these settings on another computer with a older GPU, I was still able to maintain pretty good FPS. Enjoy having better graphics below! Step 1: Reduce Jagged Edges (Aliasing)  This shows Aliasing lines on the left, the right uses 4x MSAA Jagged edges or aliasing are common in videogames. There are only two methods to remove jagged edges as of right now. Either increase the resolution to the point where the aliasing is no longer visible or use a Anti-Aliasing method which is usually provided in game settings. This guide will use a AA method known as supersampling, you can also use downsampling to achieve the same results, however this is more of a performance hit and the quality is debatable if it is better or worst, you can try this out as well but for the purpose of this guide. We are using this AA method. The launcher and vanilla BF2 only use Multisampling, this method is alright, but not as good of a result as sparse grid supersampling. The only way to use SGSSAA is to override in game AA settings with forced driver settings. Download and use nVidia Inspector in order to use supersampling AA. Extract the files somewhere on the PC. DO NOT REMOVE NVIDIA INSPECTOR.EXE FROM THE FOLDER IT WAS UNZIPPED TO WITHOUT ALSO MOVING THE XML FILE THAT WAS INCLUDED WITH THE SOFWARE. MAKE SURE BOTH "CustomSettingNames_en-EN.xml" AND "nvidiaInspector.exe" STAY TOGETHER 1. Turn off AA ingame via PR Launcher. 2. Open nVidia Inspector 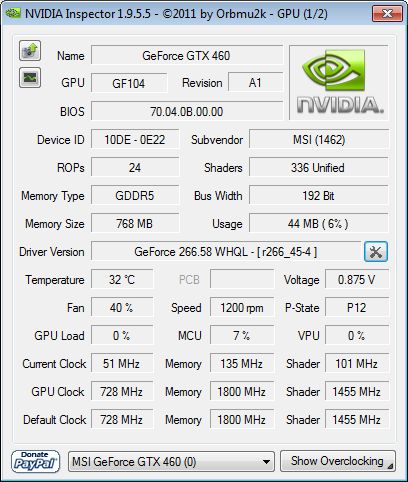 Click on the Wrench and Screwdriver Icon on the middle right side of the window.  Step 1: Select BF2 from the list, then add PRBF2.exe using the "Add application to current profile" button. PRBF2.exe should be located in the BF2 Folder, example: "C:\Program Files (x86)\Steam\steamapps\common\Battlefield 2" Using the image as reference, follow step 3, 4 and 5. Ignore Step 2, NVidia Inspector should already have the correct flag for step 2, the BF2 flag should already be set. If not, the flag is 0x40000000 (Battlefield 2) Make sure Antialiasing - Behavior flags is set to "None" Step 3: Set these Settings Compatibility Antialiasing compatibility: "0x40000000 (Battlefield 2)" Antialiasing Antialiasing - Mode: "Override any application Setting" Antialiasing - Setting: "4x [4x Multisampling]" Antialiasing - Transparency Supersampling: "4xSparse Grid Supersampling" Quote:
Texture Filtering Anisotropic filtering mode: "User-defined/Off" Anisotropic filtering setting: "16x" Texture filtering - LOD bias (DX): "-1.0" Texture filtering - Negative LOD Bias: "Allow" Texture filtering - Quality: "High Quality" Optional You can also turn on Ambient Occlusion while you are in nVidia Inspector, this gives objects more depth for 3D, this also is a performance hit. You can use this On or Off depending on how much of a performance hit you are getting.  Shows AO on and off In order to use AO, set these settings as well. Compatibility Ambient Occlusion compatibility: "0x00000003 (Fallout 3)" Common Ambient Occlusion setting: "High Quality" Ambient Occlusion usage: "Enabled" Hit APPLY CHANGES BEFORE EXITING Step 4: SweetFX to Improve Colors, Shadows and Lighting SweetFX is a similar tool to games as a video processing software provides for movies and videos. You can read more about it from the download link below. This also works for AMD cards as well! It also takes almost no performance hit no matter what kind of PC you have. You lose maybe about 3-5 fps using SweetFX. Download SweetFX 1.5 A comparison shot of SweetFX Off and On http://sfx.thelazy.net/games/screenshot/586/ Disclaimer: SweetFX is a 3rd party program that improves graphics in games that use DirectX with a shader method, it is the same as Radeon Pro for AMD owners. The creator of SweetFX stated: "EvenBalance does not ban for shader injectors so PunkBuster should not issue a ban for SweetFX" However, because this is a 3rd party program, PB may pick this up and kick you. I have never had any problems nor have others who also still use SweetFX, there has been a case of someone who claimed SweetFX got them banned, but I think that person was lying, trying to use SweetFX as a excuse to get unbanned when they were really using some sort of hacks. I am not responsible for any bans that may occur especially if you try and pull this joker move as well. To Install Extract all files in the BF2 directory example: "C:\Program Files (x86)\Steam\steamapps\common\Battlefield 2" Open and edit: "SweetFX_settings.txt" Step 5: Use my SweetFX 1.5.1 Settings or your Own Code:
   /*-----------------------------------------------------------.
  /                       Description                           /
  '------------------------------------------------------------/

Game:
Author:
SweetFX version: 1.5.1
Description:

Please note when tweaking settings that higher numbers does not always equal better (nor does lower).
Finding the best settings for your game and your taste is about finding just the right amount to apply.

If you made a good setttings preset please share it with your friends, on forums and websites,
and/or submit it to the SweetFX Settings Database : http://sfx.thelazy.net/games/

This description field and the above Game and Author fields are here so you can fill in your own details for the presets you create.
Just delete this description and fill in your own and then share it with the world.

Hope you enjoy my mod.
 - CeeJay.dk

   /*-----------------------------------------------------------.
  /                      Choose effects                         /
  '-----------------------------------------------------------*/

// Set to 1 for ON or 0 for OFF
#define USE_SMAA_ANTIALIASING 1 //[0 or 1] SMAA Anti-aliasing : Smoothens jagged lines using the SMAA technique.
#define USE_FXAA_ANTIALIASING 0 //[0 or 1] FXAA Anti-aliasing : Smoothens jagged lines using the FXAA technique. WIP - Currently only works in DX9 and you need to use the FXAA injector dlls.
#define USE_EXPLOSION     0 //[0 or 1] Explosion : Scatters the pixels, making the image look fuzzy.
#define USE_CARTOON       0 //[0 or 1] Cartoon : "Toon"s the image. (Interferes with SMAA, CRT, Bloom, HDR and Lumasharpen)
#define USE_ADVANCED_CRT  0 //[0 or 1] Advanced CRT : Simulates an old CRT TV display. (Interferes with SMAA, Cartoon, Bloom, HDR and Lumasharpen, and it has a very high performance cost)
#define USE_BLOOM         1 //[0 or 1] Bloom : Makes bright lights bleed their light into their surroundings (relatively high performance cost)
#define USE_HDR           1 //[0 or 1] HDR : Not actual HDR - It just tries to mimic an HDR look (relatively high performance cost)
#define USE_LUMASHARPEN   1 //[0 or 1] LumaSharpen : Also sharpens the antialiased edges which makes them less smooth - I'm working on fixing that.
#define USE_LEVELS        0 //[0 or 1] Levels : Sets a new black and white point. This increases contrast but causes clipping. Use Curves instead if you want to avoid that.
#define USE_TECHNICOLOR   0 //[0 or 1] TECHNICOLOR : Attempts to mimic the look of an old movie using the Technicolor three-strip color process (Techicolor Process 4)
#define USE_DPX           0 //[0 or 1] Cineon DPX : Should make the image look like it's been converted to DXP Cineon - basically it's another movie-like look similar to technicolor.
#define USE_MONOCHROME    0 //[0 or 1] Monochrome : Monochrome makes the colors disappear.
#define USE_LIFTGAMMAGAIN 1 //[0 or 1] Lift Gamma Gain : Adjust brightness and color of shadows, midtones and highlights
#define USE_TONEMAP       0 //[0 or 1] Tonemap : Adjust gamma, exposure, saturation, bleach and defog. (may cause clipping)
#define USE_VIBRANCE      1 //[0 or 1] Vibrance : Intelligently saturates (or desaturates if you use negative values) the pixels depending on their original saturation.
#define USE_CURVES        1 //[0 or 1] Curves : Contrast adjustments using S-curves.
#define USE_SEPIA         0 //[0 or 1] Sepia : Sepia tones the image.
#define USE_VIGNETTE      0 //[0 or 1] Vignette : Darkens the edges of the image to make it look more like it was shot with a camera lens. May cause banding artifacts.
#define USE_DITHER        1 //[0 or 1] Dither : Applies dithering to simulate more colors than your monitor can display. This lessens banding artifacts (mostly caused by Vignette)
#define USE_BORDER        0 //[0 or 1] Border : Makes the screenedge black as a workaround for the bright edge that forcing some AA modes sometimes causes.
#define USE_SPLITSCREEN   0 //[0 or 1] Splitscreen : Enables the before-and-after splitscreen comparison mode.

#define USE_CUSTOM        0 //[0 or 1] Custom : Write your own shader by editing custom.h, and then enable it here.

   /*-----------------------------------------------------------.
  /                  SMAA Anti-aliasing settings                /
  '-----------------------------------------------------------*/

#define SMAA_THRESHOLD             0.08  //[0.05 to 0.20] Edge detection threshold. If SMAA misses some edges try lowering this slightly. I prefer between 0.08 and 0.12.
#define SMAA_MAX_SEARCH_STEPS        16  //[0 to 98] Determines the radius SMAA will search for aliased edges
#define SMAA_MAX_SEARCH_STEPS_DIAG    6  //[0 to 16] Determines the radius SMAA will search for diagonal aliased edges
#define SMAA_CORNER_ROUNDING          0  //[0 to 100] Determines the percent of antialiasing to apply to corners. 0 seems to affect fine text the least so it's the default.

// -- Advanced SMAA settings --
#define COLOR_EDGE_DETECTION          1  //[0 or 1] 1 Enables color edge detection (slower but slightly more acurate) - 0 uses luma edge detection (faster)
#define SMAA_DIRECTX9_LINEAR_BLEND    0  //[0 or 1] Using DX9 HARDWARE? (software version doesn't matter) if so this needs to be 1 - If not, leave it at 0.
                                         //Enable this only if you use a Geforce 7xxx series or older card, or a Radeon X1xxx series or older card.

   /*-----------------------------------------------------------.
  /                  FXAA Anti-aliasing settings                /
  '-----------------------------------------------------------*/
#define FXAA_QUALITY__PRESET          9  //[1 to 9] Choose the quality preset. 9 is the highest quality.
#define fxaa_Subpix               0.400  //[0.000 to 1.000] Choose the amount of sub-pixel aliasing removal.
#define fxaa_EdgeThreshold        0.250  //[0.000 to 1.000] Edge detection threshold. The minimum amount of local contrast required to apply algorithm.
#define fxaa_EdgeThresholdMin     0.060  //[0.000 to 1.000] Darkness threshold. Trims the algorithm from processing darks.

   /*-----------------------------------------------------------.
  /                     Explosion settings                      /
  '-----------------------------------------------------------*/
#define Explosion_Radius    2.5     //[0.2 to 100.0] Amount of effect you want.


   /*-----------------------------------------------------------.
  /                      Cartoon settings                       /
  '-----------------------------------------------------------*/
#define CartoonPower         1.5     //[0.1 to 10.0] Amount of effect you want.
#define CartoonEdgeSlope     1.5     //[0.1 to 8.0] Raise this to filter out fainter edges. You might need to increase the power to compensate. Whole numbers are faster.


   /*----------------------------------------------------------.
  /                    Advanced CRT settings                   /
  '----------------------------------------------------------*/
#define CRTAmount            1.00    //[0.00 to 1.00]  Amount of CRT effect you want

#define CRTResolution        2.0     //[1.0 to 8.0]    Input size coefficent (low values gives the "low-res retro look"). Default is 1.2
#define CRTgamma             2.2     //[0.0 to 4.0]    Gamma of simulated CRT (default 2.2)
#define CRTmonitorgamma      2.4     //[0.0 to 4.0]    Gamma of display monitor (typically 2.2 is correct)
#define CRTBrightness        1.2     //[1.0 to 3.0]    Used to boost brightness a little. Default is 1.0
#define CRTScanlineIntensity 2.0     //[2.0 to 4.0]    Scanlines intensity (use integer values preferably). Default is 2.0
#define CRTScanlineGaussian  1       //[0 or 1]        Use the "new nongaussian scanlines bloom effect". Default is on

#define CRTCurvature         1       //[[0 or 1]          "Barrel effect" enabled (1) or off (0)
#define CRTCurvatureRadius   2.0     //[0.0 to 2.0]       Curvature Radius (only effective when Curvature is enabled). Default is 1.5
#define CRTCornerSize        0.0100  //[0.0000 to 0.0020] Higher values, more rounded corner. Default is 0.001
#define CRTDistance          2.00    //[0.00 to 4.00]     Simulated distance from viewer to monitor. Default is 2.00
#define CRTAngleX            0.00    //[-0.20 to 0.20]    Tilt angle in radians (X coordinates)
#define CRTAngleY           -0.15   //[-0.20 to 0.20]    Tilt angle in radians (Y coordinates). (Value of -0.15 gives the 'arcade tilt' look)
#define CRTOverScan          1.00    //[1.00 to 1.10]     Overscan (e.g. 1.02 for 2% overscan). Default is 1.01
#define CRTOversample        0       //[0 or 1]           Enable 3x oversampling of the beam profile (warning : performance hit)

   /*-----------------------------------------------------------.
  /                       Bloom settings                        /
  '-----------------------------------------------------------*/
#define BloomThreshold 20.25 //[0.00 to 50.00] Threshold for what is a bright light (that causes bloom) and what isn't.
#define BloomPower 0.725     //[0.000 to 8.000] Strength of the bloom
#define BloomWidth 0.0625    //[0.0000 to 1.0000] Width of the bloom

   /*-----------------------------------------------------------.
  /                        HDR settings                         /
  '-----------------------------------------------------------*/
#define HDRPower 1.075 //[0.00 to 8.00] Strangely lowering this makes the image brighter
#define radius2  0.825 //[0.00 to 8.00] Raising this seems to make the effect stronger and also brighter

   /*-----------------------------------------------------------.
  /                     LumaSharpen settings                    /
  '-----------------------------------------------------------*/
// -- Sharpening --
#define sharp_strength 1.6    //[0.10 to 3.00] Strength of the sharpening
#define sharp_clamp    0.825  //[0.000 to 1.000] Limits maximum amount of sharpening a pixel recieves - Default is 0.035

// -- Advanced sharpening settings --
#define pattern 4        //[1|2|3|4] Choose a sample pattern. 1 = Fast, 2 = Normal, 3 = Wider, 4 = Pyramid shaped.
#define offset_bias 1.5  //[0.0 to 6.0] Offset bias adjusts the radius of the sampling pattern.
                         //I designed the pattern for offset_bias 1.0, but feel free to experiment.

// -- Debug sharpening settings --
#define show_sharpen 0   //[0 or 1] Visualize the strength of the sharpen (multiplied by 4 to see it better)

   /*----------------------------------------------------------.
  /                       Levels settings                      /
  '----------------------------------------------------------*/

#define Levels_black_point 16    //[0 to 255] The black point is the new black - literally. Everything darker than this will become completely black. Default is 16.0
#define Levels_white_point 235   //[0 to 255] The new white point. Everything brighter than this becomes completely white. Default is 235.0

//Colors between the two points will stretched, which increases contrast, but details above and below the points are lost (this is called clipping).


   /*-----------------------------------------------------------.
  /                      TECHNICOLOR settings                   /
  '-----------------------------------------------------------*/
#define TechniAmount 0.4         //[0.00 to 1.00]
#define TechniPower  4.0         //[0.00 to 8.00]
#define redNegativeAmount   0.88 //[0.00 to 1.00]
#define greenNegativeAmount 0.88 //[0.00 to 1.00]
#define blueNegativeAmount  0.88 //[0.00 to 1.00]


   /*-----------------------------------------------------------.
  /                      Cineon DPX settings                    /
  '-----------------------------------------------------------*/
#define Red   8.0  //[1.0 to 15.0]
#define Green 8.0  //[1.0 to 15.0]
#define Blue  8.0  //[1.0 to 15.0]

#define ColorGamma    2.5  //[0.1 to 2.5] Adjusts the colorfulness of the effect in a manner similar to Vibrance. 1.0 is neutral.
#define DPXSaturation 3.0  //[0.0 to 8.0] Adjust saturation of the effect. 1.0 is neutral.

#define RedC   0.36  //[0.60 to 0.20]
#define GreenC 0.36  //[0.60 to 0.20]
#define BlueC  0.34  //[0.60 to 0.20]

#define Blend 0.2    //[0.00 to 1.00] How strong the effect should be.


   /*-----------------------------------------------------------.
  /                      Monochrome settings                    /
  '-----------------------------------------------------------*/
#define Monochrome_conversion_values float3(0.18,0.41,0.41) //[0.00 to 1.00] Percentage of RGB to include (should sum up to 1.00)


   /*-----------------------------------------------------------.
  /                      Lift Gamma Gain settings               /
  '-----------------------------------------------------------*/
#define RGB_Lift  float3(0.972, 0.972, 0.972)  //[0.000 to 2.000] Adjust shadows for Red, Green and Blue.
#define RGB_Gamma float3(0.980, 0.980, 0.980)  //[0.000 to 2.000] Adjust midtones for Red, Green and Blue
#define RGB_Gain  float3(1.015, 1.015, 1.015)  //[0.000 to 2.000] Adjust highlights for Red, Green and Blue

//Note that a value of 1.000 is a neutral setting that leave the color unchanged.

   /*-----------------------------------------------------------.
  /                        Tonemap settings                     /
  '-----------------------------------------------------------*/
#define Gamma       1.000  //[0.000 to 2.000] Adjust midtones. 1.000 is neutral. This setting does exactly the same as the one in Lift Gamma Gain, only with less control.

#define Exposure    0.000  //[-1.000 to 1.000] Adjust exposure

#define Saturation  0.000  //[-1.000 to 1.000] Adjust saturation

#define Bleach      0.000  //[0.000 to 1.000] Brightens the shadows and fades the colors

#define Defog       0.000  //[0.000 to 1.000] How much of the color tint to remove
#define FogColor float3(0.00, 0.00, 2.55) //[0.00 to 2.55, 0.00 to 2.55, 0.00 to 2.55] What color to remove - default is blue


   /*-----------------------------------------------------------.
  /                       Vibrance settings                     /
  '-----------------------------------------------------------*/
#define Vibrance     0.13  //[-1.00 to 1.00] Intelligently saturates (or desaturates if you use negative values) the pixels depending on their original saturation.
#define Vibrance_RGB_balance float3(1.00, 1.00, 1.00) //[-10.00 to 10.00,-10.00 to 10.00,-10.00 to 10.00] A per channel multiplier to the Vibrance strength so you can give more boost to certain colors over others


   /*-----------------------------------------------------------.
  /                        Curves settings                      /
  '-----------------------------------------------------------*/
#define Curves_mode        0 //[0|1|2] Choose what to apply contrast to. 0 = Luma, 1 = Chroma, 2 = both Luma and Chroma. Default is 0 (Luma)
#define Curves_contrast 0.10 //[-1.00 to 1.00] The amount of contrast you want

// -- Advanced curve settings --
#define Curves_formula     10 //[1|2|3|4|5|6|7|8|9|10] The contrast s-curve you want to use.
                             //1 = Sine, 2 = Abs split, 3 = Smoothstep, 4 = Exp formula, 5 = Simplified Catmull-Rom (0,0,1,1), 6 = Perlins Smootherstep
                             //7 = Abs add, 8 = Techicolor Cinestyle, 9 = Parabola, 10 = Half-circles.
                             //Note that Technicolor Cinestyle is practically identical to Sine, but runs slower. In fact I think the difference might only be due to rounding errors.
                             //I prefer 2 myself, but 3 is a nice alternative with a little more effect (but harsher on the highlight and shadows) and it's the fastest formula.

   /*-----------------------------------------------------------.
  /                         Sepia settings                      /
  '-----------------------------------------------------------*/
#define ColorTone float3(1.40, 1.10, 0.90) //[0.00 to 2.55, 0.00 to 2.55, 0.00 to 2.55] What color to tint the image
#define GreyPower  0.11                    //[0.00 to 1.00] How much desaturate the image before tinting it
#define SepiaPower 0.58                    //[0.00 to 1.00] How much to tint the image


   /*-----------------------------------------------------------.
  /                       Vignette settings                     /
  '-----------------------------------------------------------*/
#define VignetteType       1  //[1|2|3] 1 = Original, 2 = New, 3 = TV style
#define VignetteRatio   1.00  //[0.15 to 6.00]  Sets a width to height ratio. 1.00 (1/1) is perfectly round, while 1.60 (16/10) is 60 % wider than it's high.
#define VignetteRadius  1.00  //[-1.00 to 3.00] lower values = stronger radial effect from center
#define VignetteAmount -1.00  //[-2.00 to 1.00] Strength of black. -2.00 = Max Black, 1.00 = Max White.
#define VignetteSlope      8  //[2 to 16] How far away from the center the change should start to really grow strong (odd numbers cause a larger fps drop than even numbers)
#define VignetteCenter float2(0.500, 0.500)  //[0.000 to 1.000, 0.000 to 1.000] Center of effect for VignetteType 1. 2 and 3 do not obey this setting.


   /*-----------------------------------------------------------.
  /                        Dither settings                      /
  '-----------------------------------------------------------*/
#define dither_method      2  //[1 or 2] 1 = Ordered dithering (very good and very fast), 2 = Random dithering (different but slightly slower dithering)

//Note that the patterns used by Dither, makes an image harder to compress.
//This can make your screenshots and video recordings take up more space.


   /*-----------------------------------------------------------.
  /                        Border settings                      /
  '-----------------------------------------------------------*/
#define border_width float2(1,20)     //[0 to 2048, 0 to 2048] (X,Y)-width of the border. Measured in pixels.
#define border_color float3(0, 0, 0)  //[0 to 255, 0 to 255, 0 to 255] What color the border should be. In integer RGB colors, meaning 0,0,0 is black and 255,255,255 is full white.


   /*-----------------------------------------------------------.
  /                     Splitscreen settings                    /
  '-----------------------------------------------------------*/
#define splitscreen_mode   1  //[1|2|3|4|5|6]  1 = Vertical 50/50 split, 2 = Vertical 25/50/25 split, 3 = Vertical 50/50 angled split, 4 = Horizontal 50/50 split, 5 = Horizontal 25/50/25 split, 6 = Curvy vertical 50/50 split

   /*-----------------------------------------------------------.
  /                       Custom settings                       /
  '-----------------------------------------------------------*/
#define custom_strength  1.0 //[0.00 to 1.00] Adjust the strength of the effect
You can use the "Scroll Lock" key to toggle SweetFX on/off ingame and the "Pause Break" key to reload effects ingame if there are issues. You can ALT TAB out and edit SweetFX_settings.txt at anytime, as soon as you save, the changes will be made directly ingame. If not, press the "Pause Break" key to reload the effects, making the changes. Overlays may cause conflict with SweetFX and cause crashes. If you are experiencing crashes after injecting SweetFX. Disable overlays. Final Words I have tried many settings to get the best possible graphics without too much of a hit on performance, there are other methods as I posted earlier and other AA methods. I have tried all of them and consider this to be the best for me as I still maintain close to 100 fps when playing. You can try them out and see what works best for you. I mainly made this tread so others can use what I have learned and get better graphics themselves. You can edit the SweetFX settings to your liking; however, these settings I believe are the best. There is almost no color bleeding, losing detail. Improving the shadows means making them darker, enemies that regularly would be seen are now hidden because it is darker, but with these settings, the shadows have enough contrast so enemies cannot disappear in them while still looking dark. The HDR is implemented but not over done, it is still noticeable but will not hurt your vision to the point of transitions where you may be temporarily blinded by it and killed. Where as without the effect, you wouldn't have suffered the penalty. You can add more effect to each one or less, it is up to you. This can also be used with ENB series if you wish to do so; however, I've tried both of them out separate and together, the only improvement ENB series has over SweetFX is it has true HDR and reflections. The downside of ENB is that it is a performance killer compared to SweetFX. I don't use it because even when using ENB separate, I found the colors bleeding and shadows too intense for my liking, it loses detail and the blur effects ruin the clarity. The reflections are too intense making objects like players too shiny. If you want to use ENBseries and SweetFX, I advise you to turn off HDR, Bloom, Lift Gamma Gain, and Curves in SweetFX. Using both these effects in both shaders will overlap them on top of each other and the results are too intense. Code:
Q: How do I use SweetFX with ENBseries? A: By making ENB run SweetFX. You need to: 1) Rename d3d9.dll to sweetfx_d3d9.dll 2) Install the ENB series files into the same directory 3) Edit enbseries.ini so the top section looks like this: [PROXY] EnableProxyLibrary=true InitProxyFunctions=true ProxyLibrary=sweetfx_d3d9.dll That should do it. | |

|
Last edited by 007.SirBond; 2013-10-03 at 20:51..

|
|
2013-09-30, 23:38
|
#2 |
|
|
For some reason I don't have "compatibility" in step 2. Downloaded from your link.
By the way, even without that, this is absolutely gorgeous, outstanding work. |
|
|
Last edited by Rabbit; 2013-10-01 at 00:06..
|
|
2013-10-01, 00:20
|
#3 | |
|
Join Date: Dec 2012
Posts: 269
|
Quote:
You have to use this or else you will get incorrect AA and may have a blurry image. EDIT: I have edited the original post to hopefully make it more clear on this part. Thank you for letting me know. | |
|
|
Last edited by 007.SirBond; 2013-10-01 at 00:30..
|
|
2013-10-01, 00:06
|
#4 |
|
Join Date: Jan 2013
Posts: 58
Location: Louisiana
|
Love it, Bond!
|
|
|
|
|
2013-10-01, 00:44
|
#6 | |
|
Join Date: Dec 2012
Posts: 269
|
You have to use the same number samples for Sparse Grid to work correctly.
If you are using 4x SGSSAA, you have to use 4xMSAA antialiasing method. It's not true MSAA, it just takes the samples from it and renders it in another manner. If you use a higher MSAA with SGSSAA, it will look worst. "Please keep in mind that whenever you use SGSSAA you should always match the number of MSAA samples used to the number of SGSSAA samples used. 8xMSAA + 4xSGSSAA will usually have lower quality than 4xMSAA + 4xSGSSAA. This is because SGSSAA gets its sample coordinates from the MSAA samples. So if you have more MSAA samples than SGSSAA samples the SGSSAA samples will not be placed in the ideal locations. Also you cannot have more SGSSAA samples than MSAA samples for the same reason (SGSSAA uses the MSAA sample coordinates). Even though it uses MSAA sample coordinates using additional coverage samples will reduce the effectiveness of SGSSAA by changing the grid pattern so that the MSAA samples are placed closer to the center of the pixel (which is a less ideal location). This is why I advised 4xMSAA + 4xSGSSAA and not 16xCSAA (4xMSAA + 12 extra coverage samples) + 4xSGSSAA." http://naturalviolence.webs.com/sgssaa.htm EDIT: Rabit, I also noticed on the bottem right of your NVidia Inspector, there is a message saying "Missing Settings Names File - Repair Now! Quote:
Try clicking that hyperlink in your program, maybe it can fix it? It may be a fix from the program itself. EDIT2: I figured out what that is, when you unzip Nvidia Inspector. You have to extract the XML file as well, it has to be in the same folder as the .exe What I did was extract the entire folder somewhere on my PC, then I made a shortcut on my desktop to the nvidiaInspector.exe file. Also Rabbit, make sure you added PRBF2.exe to the list, looking at your screenshot you added PRlauncher.exe, I am not sure if it will work properly. PRBF2.exe should be located in the BF2 Folder, example: "C:\Program Files (x86)\Steam\steamapps\common\Battlefield 2" Updated the Guide to reflect this. | |
|
|
Last edited by 007.SirBond; 2013-10-01 at 01:39..
|
|
2013-10-01, 01:09
|
#7 |
|
Join Date: Dec 2012
Posts: 269
|
Sorry for editing the post while you are reading it. I am done editing it, thanks again for helping me improve the guide in case others make a similar mistake.
|
|
|
|
|
2013-10-01, 01:46
|
#8 |
|
|
I have several x4 multisamlplings. "Gaussian" "Gamma" and "FOSGAMMA" is there a better one to use?
Just using the basic 4x4 milti sampling. |
|
|
|
|
2013-10-01, 02:00
|
#9 | |
|
Join Date: Dec 2012
Posts: 269
|
Quote:
I advise you to make sure you have Nvidia Inspector running correctly before applying any changes. Make sure you have the XML file along with the nvidiainspector.exe. I finished the guide. I think there are no more errors or confusion if you follow it from start to end. | |
|
|
Last edited by 007.SirBond; 2013-10-01 at 02:08..
|
|
2013-10-01, 03:11
|
#10 |
|
|
First picture I posted.
 Fixes per your instructions.  Something went wrong there, I'll figure out where I went wrong tomorrow. |
|
|
Last edited by Rabbit; 2013-10-01 at 04:16..
|
 |
| Tags |
| gpu, graphics, guide, nvidia, prbf2 |
|
|


 View 007.SirBond's IP Address


 Hybrid Mode
