
 2010-08-31, 11:53
|
#1 |
|
Join Date: Jan 2009
Posts: 136
|
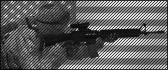
Project Reality Squad-Guide powered by:  This is a translated version of the original guide, written in german. Guide made by [NEW] Myru Translation done by [NEW] Gammlgandalf13 We hope that this guide is both informative and readable, in spite of grammatical errors. The original guide (in german) can be found here: Newcommunity.eu • View topic - Tutorial: Squad-Guide Foreword: This tutorial represents a classified, pictured and elucidated collection of behaviors sensed as appropriate. To realize the following points well in game, it’s essential, to familiarize yourself with some basic game mechanics, like firing with the PR deviation system and the right usage of assets and inventory items first. The aim of this tutorial is to impart knowledge of tactical standards and the general tactical cooperation in an Infantry squad. The expressed points were written under consideration of their operability in the public game. The outcome of this is that the operability of the tactics is not only indispensable collaboration of all squad members but their success will scale up the more individual members of a squad follow these instructions. Lots of images are animated, to play the animation just click the thumbnail. 1. Basic Behavior: “Project Reality is a team orientated game, which means the collaboration of several players is urgently necessary to accomplish important actions. Contrary to egocentric action games e. g. “Call of Duty Modern Warfare” or “Battlefield Bad Company 2” whose aim is the success and fun of yourself through killing other players, PR aims for cooperation and tactical acts with other players to realize this success and fun. According to this each player must see that exclusively self-seeking acts aren’t analogous and special personal interests are to subordinate the interests of the team.” Concerning to the teamplay it’s apposite to respect the following points: - Players join Squads to be lead tactical by the Squadleader and to bring forward the efficiency and team spirit of the team by his coordination. You got to take orders of the Squadleader! - Autonomic acts in the Squad destroy its combat effectiveness and the tactical planning of the Squadleader, viz. no lonewulfing, no disrespect of instructions, no request of kits without the strict order of your Squadleader and don’t occupy vehicles without the permission of your Squadleader. - Overestimation of you own capabilities leads to wastes! If you can’t use a Kit or Vehicle properly because you haven’t got enough experience you should, for the welfare of the team, let a more experiences player use the asset. 2. Communication: “For the effectiveness of a squad it’s essential that game relevant informations are exchanged between the members permanently. In the following the most important informations and notes concerning the usage of VoIP and Commo-rose are listed.” 2.1) Reporting the enemy: The more players shoot at an enemy, the more efficient his abatement is. Players can only fire at the enemy if they know what kind and where he is! For this reason it’s important to inform the rest of the squad via VoIP about a spotted foe. This information should be effected before engaging if possible. (look: 5.2 Surprise Fire) Reporting the enemy looks as follows: 1) Number and kind of enemy 2) Direction of the enemy 3) Big object or distance E. g: “Contact, 2 enemy Infantrymen, 255, at the blue car” “Contact, APC, 135, far away in the desert” “Contact APC and Tank, North of our position at the attack marker” “Contact, Inf squad, E(cho) 4 kp 3, at the ruin” For the direction it’s necessary to know, the more distant the enemy is the more precise the indication has to be. If a foe suprises you in the close quarter, short comes before detailed information to make fast engagements possible. From this follows: For distant enemies: bearing of the compass (255, 300, 145) or coordinate (E4kp2) For near enemies: direction (NE, beween SE and S) For very close enemies: direction (left, half-right) or 11 ó clock, 3 ó clock If you got an enemy down, it’s good to tell the rest of your squad. E. g. “Enemy LMG down, enemy HAT down…” Spotting enemy supply crates, mines, remote detonated explosives and so on also counts as spotting the enemy in some way! For coordinates via VoIP it’s good to spell the letter, as many might sound similar and might be transmitted wrong due to the noise in VoIP. (D might sound like G or E like C) The Nato-Alphabet is wise here: A = Alpha B = Bravo C = Charlie D = Delta E = Echo F = Foxtrot G = Golf H = Hotel 2.2) Health Status: The squad medic needs to know if a player needs a medic to do his job properly. Further the medic can heal only 1 player at the same time, so he needs detailed information on the kind of injury if there are more people wounded so he can decide who needs the medic the most. For this reason players got to tell the squad medic via VoIP and the “Requesting Medic” Commo-Rose-Command their injuries. There are 6 kinds of injury in PR, beginning with the lowest: 1) Wounded, not bleeding 2) Wounded, bleeding 3) Wounded, bleeding, breath sounds more intense 4) Badly Wounded, seeing black/white, coughing 5) Down, revivable 6) Dead, not revivable E. g: “Please heal me, I already see black/white and I’m almost down” References: NEVER give up/respawn unauthorized, wait until the Squadleader instructs you to do so, or ask if and where to spawn. If you don’t have contact, it’s not that important to tell the medic how bad your injury is as he has enough time to heal you. 2.3) Own Functions: To plan your own actions without being affected by the actions of other squadmembers it’s important to know what the rest of the squad is doing. Because of this squadmembers report special actions of their own. Reportable actions of your own would be e. g: 1) Throwing a grenade (“Fire in the Hole”) 2) Covering (“Revive this guy, I’ll cover your a**/back with the MG”) 3) Covering area (“I cover the narrow street to our left / I cover our back”) 4) Kit specific (“I’ll heal you now, cover us! / Here is ammo for you”) 2.4) Unable to move/Delay: To keep the squad together the Squadleader needs to know if a Squadmember can’t follow, so breaks or returns can be made. Because of this Squadmembers report if they can’t move forward through their function or enemy contacts. E. g: “I can’t follow, being suppressed!” “I heal squadmember XY at the moment, wait!” “I’m out of stamina, slow down” “I need to rearm, wait for me” “I got revived and got to wait 2 minutes covered” 2.5) Questions As mentioned in the foreword players have to relinquish autonomic decisions e. g. Kit- or Vehicle choose or own movement purposes so they don’t destroy the plans of their Squadleader. According to this it’s important that Squadmembers ask the SL before, it they want to do special actions. At the following points the Squadmember asks for permission first: 1) Kit- and Vehicle request (“Can I request kit XY? / which kit a should spawn with? / Can I take vehicle XY?”) 2) Respawn (I am dead, where should I respawn? / Shall I give up?”) 3) Movements which could lead to a divert of the Squad (“Should I enter the roof? / Shall I go onto this tower?”) Ask – wait for reply – action, in this order, not else! Announcements like e. g: “I’ll grab the Sniper kit and move onto that tower”, are unnecessary! Right would be: “Can I take the Sniper kit and move onto that tower?” 2.6) Acknowledgement If the SL instructs you or one SM requests something of another SM, it is wise to reply via VoIP, so the other one knows if he can count on you to accomplish the asked point, or if it isn’t possible. The SM gives response for: 1) Requests (“I have (no) ammo for you! / I’m out of epipen!...”) 2) Instructions of the SL or other SM (“Ok / Roger that / Copy / No / I can’t…”) It is also important to ask for repeat if you didn’t understand a request or even worse, the SL’s order properly. It is very bad to ignore a misunderstood order, or simply not to answer, as the SL mostly understands no reply as a “YES”. 3. Movement “To be efficient, the squad has to move in a way that the members can stick together, the firepower is maximized as the squad is very close to each other as well as recon of enemies is being minimized by selection of the right formation. In the following, easy but effective orders are listed which’s effectiveness raises, the more Squadmembers follow them.” 3.1) General: The Squad has to appear complete even on the move to dominate the enemies. For this it’s important, to follow these points: 1) Don’t let your squad split due to buildings/the environment, always move together on one side of a street/wall or river. The medic needs to have a safe path to the Squadmembers if they might get killed.  2) Squadmembers always have to stay in touch with the group and don’t move alone. If someone e. g. has to spawn away of the squad (FOB), he has to wait for at least 1 other squadmember to move to the rest of the Squad, to outnumber and dominate single enemies. 3) Don’t walk directly behind or next to another squadmember but a little shifted so you can shoot next to him. 4) Don’t all watch the same direction, you should watch the line of sight of other Squadmembers and watch another direction. The ones in the back of the group even look the groups back some times. 5) Safe your sprint! Fast movements harm your ability of observing, raises the enemies ability to spot you, diverts the squad and wastes stamina, which are needed in firefights!  6) Follow the rules of covering (look: Movement and Cover) 7) Don’t move alone over open areas like fields or streets. (look 3.4 Jump) 3.2) Formations: Formations have the use, that the squad isn’t very vulnerable for the enemy when it’s on the move and they rise the squads’ combat effectiveness. As complex tactics don’t work that good in public, you should use only 2 formations there, chain and line, each one with individual advantages and disadvantages. - The line: In the line the squadmembers move one after another. The squadleader usually takes the lead there, so the biggest part of the Squad has visual on him and can quickly react on changes of direction. The medic should be in the middle and not at the lead, for his own protection.  In the line the squadmembers don’t look to the front, but logical: - Who is in the front, watches the front! - Who is in the middle, watches the sides! - Who is in the back, watches the sides and the squad’s back!  Due to its slim form the line has the advantage that the squad can’t be divided into parts at buildings or natural conditions like walls that easy, because it can move complete on the left or right, without breaking the it.  For the squadmembers in the line it’s difficult to fire into the direction of movement, as they would hit the spines of their mates in front. It’s better to carry the firefight to the sides as this Animation shows.  Due to the simple way of changing the direction of movement in the line, and low thread of dividing the squad the line is very good for movements in city areas. - The Chain: In the chain the squadmembers move next to each other, usually the squadleader is in the middle so the squad has to pay increased attention on possible changes of direction and sticking together. The medic should be in the middle of this formation as well, for his own protection.  In the line the squadmembers don’t look to the front bloody-minded, but logical: -Who is in the middle, watches the front! -Who is on the sides, watches the particular side! (walking on the left means watching left) -All squadmembers watch their back from time to time!  Due to its broadness the chain has the disadvantage, that you can’t move along obstacles on the side that easy. It is hard to fire to the sides when moving as a chain as you pretty surely would hit your mates, but it’s much easier to fire to the front as this animation shows.  The chain doesn’t let you change your direction of move very quick or pass obstacles together, but it brings a big firepower which is great for movements in woods and open areas. This video shows how the line is very practical to effectively engage sudden enemy contacts in woods and open areas. 3.3) Movement and Cover: To move efficient with the squad, it has to stay out of the enemies visual as long as possible. To accomplish this it’s indispensable to use covers at all time! Advices: 1) Always move near trees and objects which give you cover 2) If possible move through dikes / slots or behind walls. 3) In urban areas avoid moving over open streets, prefer side streets. 4) Always move from cover to cover, avoid open areas. 5) Don’t move crossways in front of the enemy, they are eye-catching and easy to clear up even on long distance, better fall back and move in the cover of a dike unseen. 6) Don’t walk over revivable enemies, they hear when you stand on their bodies and will give your position away via VoIP! Therefore don’t jump at enemy kits, approach careful! 7) Avoid Sounds when you are near enemies which means no commorose-commands, no ladders and don’t throw a hook!!  right wrong  right wrong 3.4) Jump: Not all the time you can approach the enemy covered, there are streets or open areas without good covers to be crossed. The danger to be spotted and engaged by the enemy is very high there. A skilled player needs about 4 seconds to hit an enemy on a distance of 200m who’s running over a broad street with big chances to kill him. 1 second to spot the enemy and deploy the weapon and 3 seconds to have minimum deviation. So the squad has 4 seconds time to cross an open area without casualties, that is why the squad has to “jump” to cross the open area as fast as possible. To do the jump effective, keep the following points in mind: 1) The squad as to be undetected before the jump, it makes no sense to jump into an enemy whose got minimum deviation and aiming onto your undetected jumping spot. In this case the enemy has to be engaged first. 2) You will jump out of your cover over the open area to your next cover! Dikes and walls are perfect. 3) Each squadmember must have enough stamina to cross the open area sprinting! 4) The jump looks as follows: The squad gathers unseen of the enemy, when the squadleader says so the whole squad runs across the open area to the new cover. For that it’s important to stick together, no one moves further than ordered! 5) Should the distance for the jump be too big, so you need much more than 4 seconds to get over it you shouldn’t jump. When crossing waters or longer open areas, it’s suggestive if the squadleader divides the squad into 2 fireteams á 3 squadmembers. The first fireteam, consisting of SL, LMG and Medic covers while the second fireteam crosses the river or the open area. When the jumping fireteam has reached the cover on the other side, it will cover the first fireteam which can catch up with them now. Points 1–3 are necessary here. 3.5) Evasion: When the squad is involved in a firefight with a superior enemy, the SL can order evasion to drop back to avoid casualties in the squad. Evasion is easy to do, but many egocentric players refuse to withdraw because another point on the scoreboard is more worth to them than the solidarity of the squad. Now you should act like a example and obey the SLs orders. Evasion has to be made under consideration of the following points: 1) Moving back a few meters is not evasion! Evasion means, to get out of the fights at all. (to heal, rearm and then go for the enemy again with another strategy) 2) The whole squad drops back, no one fights alone! 3) If you get killed, here it’s more important than elsewhere, tell the squad immediately so they can maybe come back and revive you. (SLs decision, medic will not stay back on his own!) 4) SL tells you where to rally, this point is firm, and you will not move to another place! 5) The LMG can suppress the enemy position if the SL says so (NOT on its own!) (look: Suppressing Fire) 4. Positions / Covering “To raise the efficiency of a static squad all members should know what position is good to observe the environment and note suddenly appearing enemies.” 4.1) Location: A position is the place where from the player observes and carries out the firefight. When choosing your personal position please watch the following aspects: 1) The squad sticks together like in the same dike, house or floor, on the same roof and so on. The medic can reach every member and the deviation of the compass isn’t too big.    2) In case of the virtual death the medic needs a safe path to your body. Or even better: The position was chosen in a way that after your death your body will slide into a sink / deepening where the medic can revive and heal you without the risk to die. Slants, sinks, walls of ditches are ideal. 3) In / on building, at balustrades and platform roofs you should use the depth of the room which means don’t lie exactly at the covering object but a little distanced to it. Thereby your weapons and equipment doesn’t look through a wall and your shadow doesn’t loom through the walls. And you can be spotted more difficult the farer you are away from the window.   Thumbnail works even though the pictures are missing, click!!  4) Weapons with deploy mode (LMG, Marksman) and Sniper* are always accurate in the deploy mode, no matter if you stand or crouch. As the changeover from stand to crouch maximates the deviation it’s suggestive to take position behind covers with this weapons in a way that you can attack enemies but you can kneel down to be absolutely covered from enemy fire. Here you got the advantage that you can kneel down, stand up and fire immediately and then get back behind your cover (Deviation doesn’t change if you change between kneeling and standing) and you are more flexible in your movement when you kneel than when you’re prone. *Snipers don’t have a deploy, but they’re accurate when you stand with them! 5) Sticking together doesn’t mean to stand like you were in the tube. Keep your spacing but keep point 1 in mind. (e. g. stay in one floor, but take position at the windows.) 6) If you take place in an assed (HMG, TOW or AA), primary players with standard kits will do that, so if they get killed in the asset there’s no requestable kit lost! If a player with a request kit (like medic) should be forced to man an assed so he will drop his kit before manning the asset (request drop-kit – right click on “Request kit”), so if he dies the squad has further access to the said kit. 4.2) Behaviour: The covering out of a position is only effective if you keep certain aspects in mind: 1) Covering all around which means watch every direction where an enemy might appear. Squadmembers have to look after each other and cover to a direction that is uncovered. Here it’s also important not to forget the rear cover e. g. covering stairways.    2) Covering doesn’t mean to grab the binoculars. To be able to engage enemies who appear suprising the guns stay in your hands! Potentially dangerous enemies appear in a distance which can be observed good with scope zoom. (Inf up to 300m, Vehicles even more) 3) Exception for point 2 is the building of assets with the shovel. The whole squad never digs, but 2 – 3 persons, so the rest of the Squad can cover them. 4) Not each weapon can cover all directions. The medic with his ironsights can’t cover over big distances he should switch positions with the marksman. Squadmembers got to notice this by their own and switch positions. 5. Firefight “To fight the enemy with the squad effective, it’s convenient to keep some guidelines and techniques in mind. Hereby the enemy threat should be eliminated as fast as possible and the possibility to answer your fire accurate should be gone.” 5.1) Basics: Fighting the enemy is one of the primary objectives in PR besides taking strategically important points. To get the maximum of firepower out of a squad the following points are important: 1) If the squadleader gives you an order, you’ll obey it! If you aren’t allowed to fire you will not fire until the enemy fires at you! 2) Fire logical, which means knowing the deviation of each weapon and using the right fire mode. Fireing full automatic on distant targets is only suggestive with MGs. 3) You can force enemies to take cover. To avoid the enemy firing at you, keep up the fire on their position, keep up the suppression as long as possible by firing as near to the enemy as possible when you can’t see his body and don’t stop until the enemy is no more! 4) Explosive ordnances like hand grenades or launched grenades are an effective instrument in fighting the enemy, and to confuse them so it’s important to use them active if the situation allows it. Don’t fire AT weapons on the enemies who can be engaged with conventional ammo, save the rockets for vehicles!! 5) Grenadiers should launch smoke in front of the enemy position first, to take the enemies eyes and then killing the blind enemy with HE grenades. Nothing is worse than standing in smoke with suppression while grenades are incoming to your left and right. 6) Out of point 5 follows, that the own positions shouldn’t be smoked if you want to continue the firefight, as the enemy can flank you easily because you can’t see their movements anymore. It’s only wise to smoke your own position if you want to retreat or the enemy wants to revive. 7) Incendiary grenades can be used as support when trying to bypass or flank hostile infantry. Due to the loud, continuing burning sound, they discombobulate enemies and drown your own footsteps and moving-noises out, which makes it harder for the enemy to determine your position. For this reason, it's wise to throw an incendiary grenade towards an enemy position before moving in, but keep in mind, that its sound always alerts enemys to your general presence and breaks your stealth. 5.2) Surprise Fire: Surprise fire is the abrupt opening of a firefight against a not suspecting enemy. The aim is that all squadmembers fire with minimum deviation at an unsuspecting enemy at once and take him out this way. The surprise fire is very effective and should be the standard procedure against every enemy who don’t know of your presence. For this you got to keep the following points in mind: 1) Spot the enemy, but don’t engage yet. 2) The squadleader will put a marker on the enemy and all squadmembers will deploy their weapons. 3) When the long range weapons (LMG and marksman) have their minimum deviation they will fire first if the squadleader doesn’t give another order. Enemies who pose the biggest threat to you have to be engaged first: LMG (high firepower) Marksman (very accurate long range fire) Officer (can mark enemies) Grenadiers (very high suppression) HAT / LAT (threat for own vehicles) 4) The rest of the weapon will join the firefight AFTER the first shots of LMG / Marksman, not before! Hereby the possibility of a first hit is drastically higher. 5) Should the enemy have spotted you before LMG / Marksman are ready to fire, everyone will fire immediately. Same is if another player of the team fires at the enemy. (Killing the enemy before he gets behind cover!) Should enemy vehicles be the target of your surprise fire, it’s advisable to let the AT weapons place the first shot. 5.3) Suppressing Fire Suppressing fire is the extended version of the in chapter 5.1, point 3 mentioned suppressing fire. Suppressing fire isn’t primary used to hit the enemy, but prevent his movements and bring him into a situation that he can’t fire accurate. This is supposed to allow you to avoid, or avert the suspicion of the movements of own troops. Suppressing fire is the most effective if it’s a combination of full automatic weapons like vehicle MGs and HMGs. So that suppressing fire works properly, all squad members have to keep the following points in mind: 1) The SL orders suppressing fire and gives you the target (talk or marker) 2) All squadmembers fire to the mentioned position, no matter if they have visual on the enemy or not! 3) If you have visual on an enemy, hit him accurate, but if the visual is lost you got to spread bullets on the enemy position again! 4) You’ll stop firing if the SL says so, not before! 5) Use grenade launchers if you have. 6) Marksmen are the exception! They keep their fire and the deviation low and they’ll kill enemies who try to escape the suppressing fire. If you try to evade the LMG can be ordered to cover the squad. The MG gunner suppresses the enemy while the rest of the squad evades. Works only over short distances so the MG isn’t too far away from the squad. It makes no sense, to set the weapon to full automatic and empty the full magazine as the suppression effect only effects if bullets impact in a specific distance to the enemy. So: Fire very much, but not into the ground 2m from you, fire at the enemy! Suppressing fire even works on the move and is wise if you are being surprised by enemies in close quarters who are covered and you have no cover at all. The aim is to prevent the enemy from taking accurate shots, but get behind cover. Each squadmember will fire to the direction of the enemy from the hip while he is on the move to the next cover. As you deal suppression to the enemy while you are on the move you prevent him to aim for your movement properly. Closing Words: This guide isn’t in its final version, it’s being expanded, if something useful comes to my mind. |

|
Last edited by Myru; 2010-08-31 at 23:00..

|
|
2010-08-31, 12:16
|
#2 |

Join Date: Apr 2009
Posts: 40
Location: Erfurt
|
Great Guide!!! Sticky! Also awesome because of the illustration of tactics and strategies with pics, animations and vids!
|
|
|
Last edited by Stigma; 2010-08-31 at 19:05..
|
|
2010-08-31, 12:21
|
#3 |
|
Join Date: Jan 2009
Posts: 136
|
thanks, i'm going to add subtitles to all the videos once the subtitle-website is online again.
|
|
|
|
|
2010-08-31, 12:44
|
#4 |
|
Join Date: Apr 2009
Posts: 40
Location: Erfurt
|
Could be the virtual version of "Der Reibert" (= field manual for German Soldiers) for PR Players
|
|
|
|
|
2010-08-31, 17:40
|
#5 |
|
Join Date: Jun 2009
Posts: 149
Location: Bavaria
|
Lets see what the "English" people think of my translation.
But big thanks to Myru for doing all this, it was a big effort for him pretty sure. THANK YOU Edit: Can any Admin please fix the video links? Well, if myru doesn't do so. |
|
|
|
|
2010-08-31, 18:21
|
#6 |
|
Join Date: Jan 2009
Posts: 1,800
Location: Viking Stronghold.
|
Only type what comes after the = in the youtube links
would be cool with some english subtitles for those who didnt study german |
|
|
Last edited by Elektro; 2010-08-31 at 20:10..
Reason: removed video links - OP fixed
|
|
2010-08-31, 19:01
|
#7 | |
|
Join Date: Apr 2009
Posts: 40
Location: Erfurt
|
Quote:
| |
|
|
|
|
2010-08-31, 19:55
|
#8 | |
|
Join Date: Jan 2010
Posts: 72
|
Quote:
Thanks guys  : : 
| |
|
|
|
|
2011-04-06, 20:39
|
#9 |
|
Retired PR Developer
|
long time ago since this was updated. so i am just pushing it
|
|
|
|
|
|
|
|
2011-04-06, 22:15
|
#10 |
Join Date: Apr 2009
Posts: 171
Location: nj
|
O_O... nice guide
|
|
|
|
 |
| Tags |
| guide, squadmember |
|
|


 View Myru's IP Address

 Linear Mode

